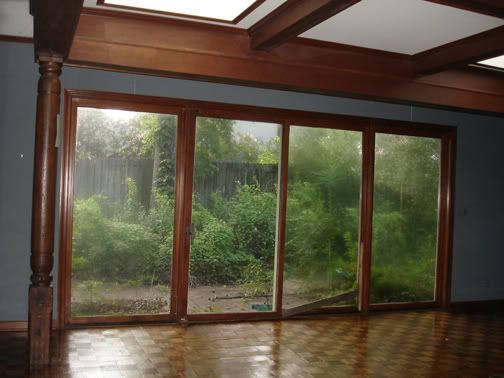
Our ballroom has a wall of windows, as I mentioned in my last ballroom-makeover post here. This is a shot of how they looked:

The left-middle window was a slider, and it was badly rotted. There were gaps between the slider and stationary windows, and I was worried feral dogs would find their way in and eat my babies in the night <--It's not true that it was *my* worry, but my mother in law absolutely was sure it was going to happen. My concern was the effect on our utility bills, what with all the cool air going straight out and the muggy outdoorsy air finding its way in. We weren't even giving mother nature a challenge!
We knew we'd have to sink a little money in replacement windows, but it wasn't until we got several quotes that we realized how severe the sinkage would be. The windows were custom in 1976. If you consider inflation, we were going to have to spend upwards of 12,000 on exact copies.
Yeah, that was never a realistic option.
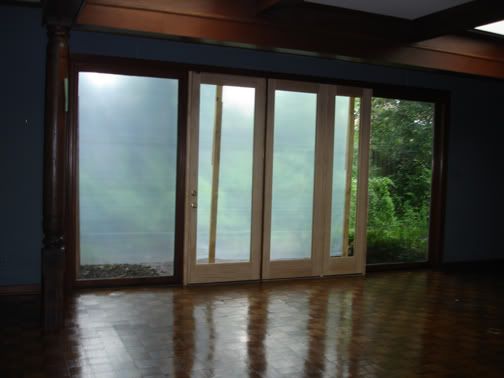
I got in touch with my cousin's father in law. He is a skilled handyman. The best (i.e., most economically feasible) option he had for us was to go with a commercial door/window company. They offered odd off-the-shelf sizes, which was the only way to keep the cost down. My understanding was that we'd have a door and two panels of equal size to fill the 8'x8' gap where the rotted door and panels were removed. Instead, it looked like this:

I know the pic is hard to decipher. You're seeing extra 2bys and some weather protection outside of the glass. The wood is unfinished, which was by design (another way we kept the cost "low").
Our handyman did the best he could and was as surprised as I was when the windows were not equal widths. He made a call, and the manufacturer explained these were the best panel sizes they had to offer with the space we needed to fill. The wonkiness cost 3,000, by the way. Not cheap. And they were installed, and the quality of the work was lovely. Nonetheless, I was ridiculously devastated by the outcome. When I make mistakes with money, I torture myself. BG was a little worried when he found me sitting in the middle of the ballroom around midnight crying about how out of place the materials looked. We had a big decision to make.
Given the costs of the very many scenarios we considered before going with the off-the-shelf option, we decided we'd keep the new panels in as a temporary solution--temporary until we hit the lottery and can do a total dream reno on the ballroom, that is. I was unhappy with but resolved to live with this set-up. I also learned about a thousand lessons about reno management during this process.
I'm so excited to reveal that, as of today, I can say with confidence that our handyman was right on and that it would have been ludicrous to spend any additional money on replacements.

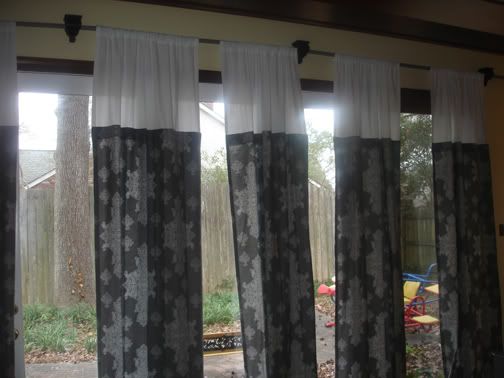
My super sweet grandma did some of her chicken voodoo magic and added white sailcloth to the tops of the gray panels I bought at Target. I painted the replacement door and windows white so that they would disappear behind the drapery. Maybe I inherited some of my grandma's voodoo powers, eh?
For a huge-mongous (210") drapery rod, we used 1/2" gray PVC pipe and couplings from Lowe's. Allen and Roth cornices (also from Lowe's) support the rod. I found them on mayjah clearance a few months ago and grabbed them. So glad I did!
The gray and white are perfect against the pale gold paint and the bright white trim. We left the original windows in their cherry encasements. Don't fix it if it ain't broke!
I think I will paint the cornices gray at some point so it all looks like a cohesive drapery set-up. But not now. Now I am going to go sit in the middle of my ballroom and enjoy the view.
So stinking pretty. I just love it.
ReplyDelete