Saturday, July 23, 2011

Black and white and red all over

Do you guys remember the old joke: What's black and white and red all over?

From my experience, there are three answers. One is a sunburned zebra. If the smarty-pants joker tried to fool you with the homophone "read," it's a newspaper. If you live with the G family, it was the point of inspiration for the breakfast-to-mud-room redesign, with the warm cherry trim and casements providing the red all over.

Black and white were a must for a bit of drama in the space. But the main color was tricky. Martha's Butterscotch really appealed to me and looked lovely with the cherry, but I worried the combo would be too Halloween. And we all know what happened in Halloween--naked, dead babysitters. And really bad acting. No thanks.

I moved on to the other colors in my muted citrus palette. Gold didn't feel right. Green? Hm. Maybe green. Then I started googling "rooms with green and black." Wow. There is a lot of gorgeousness to be seen, as long as you shield your eyes from the hideousness.

Green was it. Four weeks taken off my life because of wallpaper trauma, three coats of Spanish Moss, two silk-cotton blend drapery panels, and one new light fixture later... Welcome to our new mud room! Let's take a tour :)

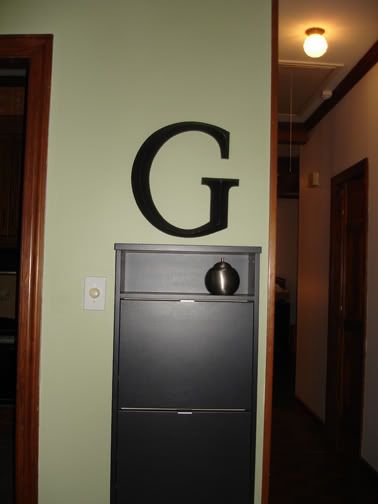
When you walk through the door, you see:
Photobucket

Is anyone surprised? I am like a male cat peeing on trees. Must mark the territory with our G.

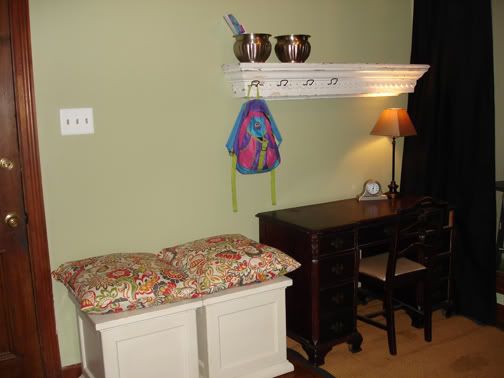
Across from the Ikea shoe cabinet pictured there under the monogram, we've got cushioned seating, BG's grandma's desk, and an antique cornice.
Photobucket

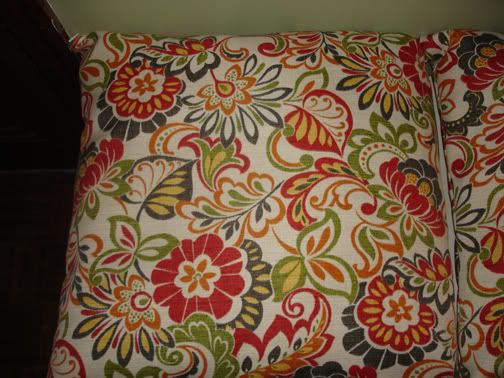
Here's a close-up of that fabric:

Photobucket

BFF-J gave up a weekend to help me choose just the right thing and sew up a storm (more projects from her to be seen in future blog installments). I like the fabric more every time I see it--which has been a lot--so I know it really was The One.

In our old house, the cornice served as a shelf for miscellany. Now, however, I've added peg-board hooks for backpack storage. If the system works, the four little Gs will never again be searching frantically on school mornings for their belongings. *uproarious laughter*

A girl can dream.

The two brushed silver indoor planters are for incoming and outgoing mail. 

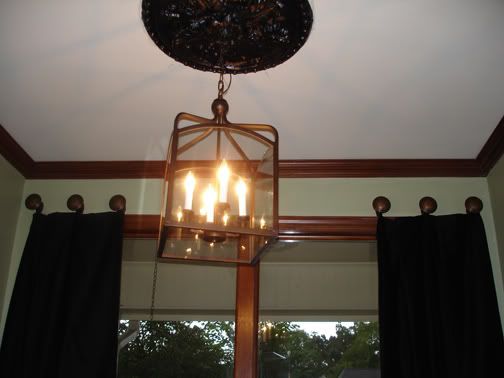
And lastly, here is a shot of our new drapery, hardware, and light fixture:
Photobucket

I was totally inspired by all the lanterns in NOLA when I visited there with my friend EB. When I found one for a deal on Overstock, it had to happen. It was a horrible, stubborn fixture to install, but I think the pain was worth it.

As for the ceiling medallion, the lantern dwarfed the wee one we found within the epic peach incubator, so I painted Big Ma there black, added a bronzey glaze, and asked BG nicely to put her right back up. Unfortunately pics do not show the glazing details very well at all, so you'll have to take my word for it.

The drapery is so luxe. I ordered the panels from halfpricedrapes.com and hit a major sale on the 3rd of July. I freaking love it when stores go patriotic and sell me good stuff at a discount. Uncle Sam rocks, and I could not be more pleased with the quality of the window treatments.

The hardware you see... Anyone have guesses? I spotted a similar set-up during a playdate and Single White Femaled it without shame.

Thank you for coming on this journey with me, from the fourth circle of wallpaper hell to the bright light of an old-world lantern. I know the room could stand some accessorizing, but for now I'm just going to be [super] happy about how far it has come.
Saturday, July 16, 2011

To be a fly on that chandelier

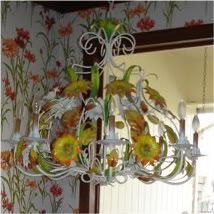
A time not too terribly long ago, this was the height of chic home design in America:

Photobucket

Now it looks like a kitschy prop from "The Brady Bunch," but can you imagine the sights it must have seen? I wonder if it was all martinis and key parties or kaftans and casseroles. 

Today we bid adieu to the humongous fixture--soon coming to ebay or Craig's List near you!--and prepped the area for its replacement. I'm dying to show you all the new fixture, but I'm sitting on my hands in order to exhibit some blog restraint. The idea of one big "ta-da" post for the mud room feeds my resolve. My hope for this room is that in 30 years, my kids aren't cursing our names for being "sooooo 2011."

As with all things G-family redo, we ran into some unforseen challenges with this portion of the project.

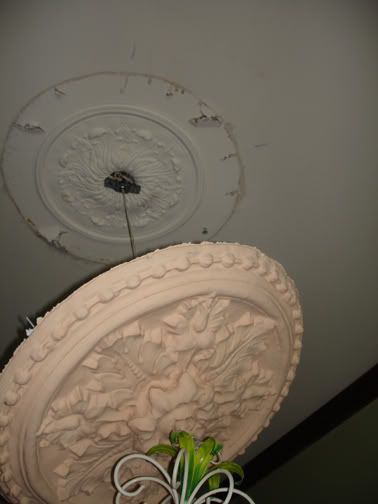
The ceiling medallion was bolted into place, but there was no way to remove the bolts gingerly. BG pulled and twisted and finally... FINALLY... broke the medallion free. What he found under it (or above it, as it were) shouldn't have been a surprise given the other bits of strangeness this house has unveiled, but one of my eyebrows shot up to my hairline nonetheless:

Photobucket

A baby ceiling medallion!

The Mama medallion has undergone her transformation from ubiquitous peach to something fabulous and will be reinstalled shortly. The ceiling has been repaired (Duct Tape counts, right?). Next step: The new source of light goes up, but for now I have an itch to wear my Gerald Ford mask while watching Rocky Horror Picture Show and doing the Hustle.

Monday, July 11, 2011

Whomp-whomp!

What was in the safe?

Now I know how Geraldo must have felt...

Saturday, July 9, 2011

The Case of the Secret Safe

In the wee hours, a certain something in my house was thumping around and causing me distress. I went to investigate.

I unscrewed the air vent, which seemed to be secured tightly (probably not the source of the thumping).

I poked at the electrostatic air filter, which was a little loose (probably the source of the thumping).

But I had this feeling there was something more

With my pulse racing and my stomach somewhere in my throat, I tilted the filter toward me.

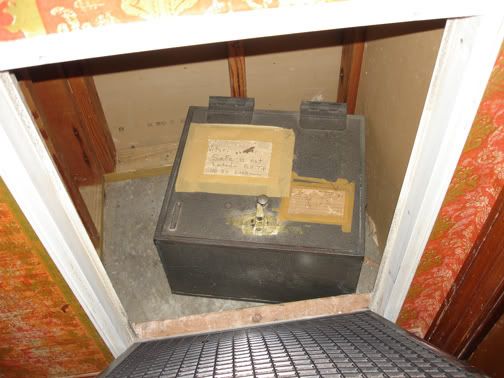
And this is what I saw:

Photobucket

That is a safe, with a handwritten note taped across the top. The note reads: "Safe is not locked. Pull top up by knob."

Many thoughts are flying through my head at this point. First, why would you give someone instructions on how to open your safe? Isn't that information usually private? My expectation would involve a combination, secret key, retina authentication... Have I just seen too many movies?  Second, I wonder what's in there! Ooooh! This could be a blog post!

My top three most plausible ideas are:

1. Donkey wheel that, when turned, will change the G Family's location in time and space.

2. Jimmy Hoffa.

Tied for 3. Thomas Crown's supplemental storage or a zombie head.

I have not opened the safe to confirm my guesses. What do you think could be in there? And, maybe more importantly, what do you think is?

Monday, July 4, 2011

A blank canvas

The breakfast room is repaired and primed and ready for some MBG flavor.

We've been trying to define our needs for the space. As it turns out, what we don't need at all is "a breakfast room."

We'd like to create an area where the kids can hang backpacks, BG can drop his laptop and briefcase, our big girl can do homework [Time out for existential crisis: How did she suddenly grow into a second grader? Who said that was OK? I have to go throw up now.], and we can sort mail and pay bills. I guess a mud room and family office/workspace are in our future. 

I've made a few purchases and have been clearing the vague "what about..." cobwebs from my vision. We have an insane week and weekend ahead, and then it's time for what the design shows call loading the room. I can't wait to unveil the big after shot! No, really, I can't wait. Can we just fast-forward to next weekend?

Sunday, July 3, 2011

...more than the sand on the beach...

It isn't just a love poem.

I left off Monday night with a plan and the early execution of that plan. Then I got really tired and burnt out. The Tues-Thurs break was nice, but this weekend, I got back into the breakfast room. BG mostly got a reprieve... if taking majority care of the children is any sort of deal. Sucker.

A brief recap of how we handled our wallpaper hell:
(1) Peeled off all the adhesive backing that would cooperate
(2) Gently sanded down the adhesive backing that wouldn't (this was to get rid of the fuzzies, not to sand it down to the wall)
(3) Swept down the walls to get rid of sanding dust
(4) Covered all wall surface with shellac-based primer
(5) Filled damaged spots with joint compound
(6) Sanded joint compound
(7) Currently repeating steps 5-6 as necessary to get a smooth finish

I just applied the final (gawd, I hope) layer of joint compound to the damaged areas and thought I'd share some pics:

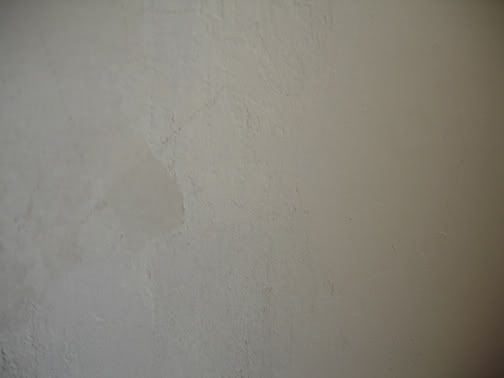
An example of the shellacked damage (<--this is fairly representative of how 2/3 of the room turned out after steaming away the evil wallpaper):
Photobucket

^If you stare at this pic with your head all sideways and dog-like, it will eventually make sense. Those indentations shouldn't be there.

Watching the mud dry:
Photobucket

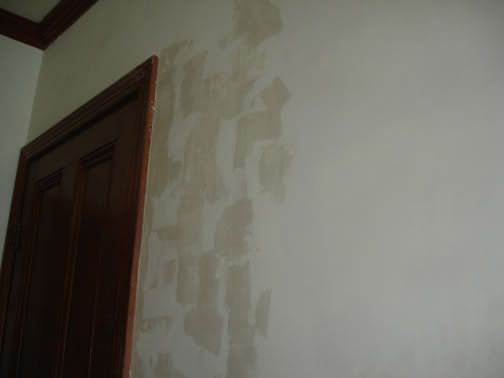
A sample of the mess:
Photobucket

Next time the Gulf needs a load of sand to stave off erosion, the Army Corps of Engineers should give gypsum a try. Add a little water, and you've got a wall!